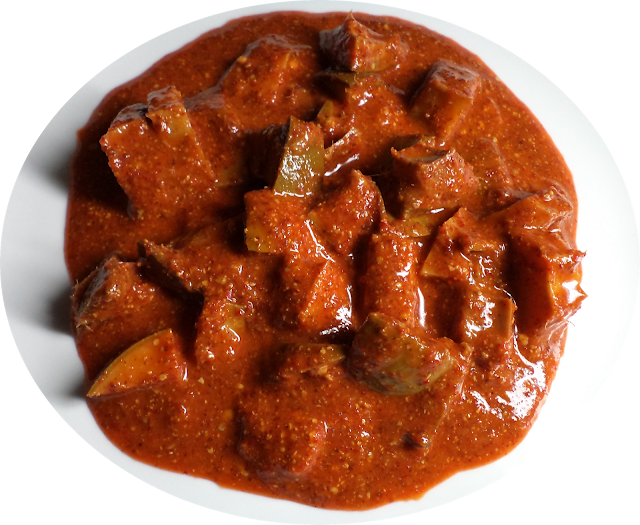
Tuesday, 4 September 2012

267) BREADFRUIT PAYASAM

BREADFRUIT PAYASAM
A SCRUMPTIOUS, SWEET, FRAGRANT DESSERT


Ingredients:

     1)    Fully mature whole breadfruit – 400 gm. (or finely chopped after peeling and de-coring – 325 gm.)
     2)    Jaggery (unrefined cane sugar) – 400 gm.
     3)    Coconut – 1½ (or freshly grated coconut – 450 gm., see tip)
     4)    Ghee (clarified butter) – 1½ tablespoons
     5)    Cashew nuts – 15 Nos.
     6)    Kismis (Dried seedless grapes / sultanas / raisins) – 15 Nos.
     7)    Cardamom – 6 pods
     8)    Water – 1250 ml. (1¼ litres)


To prepare:

          Peel the breadfruit. Cut it lengthwise into 8 slices (halve thrice) and remove the rubbery, gummy core. Use a sharp knife to slice the breadfruit to thin matchstick-like juliennes.


Transfer to a flat non-stick pan. Pour in a tablespoon of ghee and set on high heat. Stir occasionally till the breadfruit heats up nicely. Now turn down the heat and let it roast leisurely for 30 minutes, stirring now and then so that it gets done uniformly.

          In the meantime, while keeping an eye on the roasting breadfruit, put the jaggery in another pan and pour in 250 ml. of water. Set on high heat. As soon as it comes to a boil, turn down the heat. Stir occasionally till all the jaggery dissolves fully. Strain it into a deep curry vessel to make the payasam.

Roasted Breadfruit Juliennes

          By this time, the breadfruit should be lightly roasted. Switch off the heat and transfer to the payasam vessel. Set it on low heat. Stir occasionally so that it does not stick to the bottom or burn. As soon as it thickens to a treacle-like consistency (thinner than jam), switch off the heat.

To save time, you can even do this time-consuming work a day before you cook the payasam. If you wish to prepare this a few days in advance, you can refrigerate this in a clean, airtight container.

          Grate the coconut (see tip). Transfer to a food processor. Measure out a litre of water. Add just enough of this water to grind the coconut to fine paste (it may take 2 or 3 batches). Now use a close meshed stainless steel sieve or strainer to take out the coconut milk. Use the remaining water to soak the pomace twice or thrice as you press, and squeeze it with your fingers against the sieve to strain out all the juice.

          Shell the cardamom and crush the seeds to powder.


To cook:

          Set the payasam vessel on high heat. Stir and let the jaggery breadfruit mixture come to a boil. Now pour in the coconut milk. Stir till it comes to a boil. If the froth rises too high, turn down the heat a little. Let boil for 5 minutes. Tip in the cardamom powder. Stir and switch off the heat.

Pour the rest of the ghee (½ tablespoon) into a tiny pan and tip in the cashew nuts. Set on low heat. Stir till the cashews turn a light brown. Now add the Kismis, stir just once and switch off the heat. Pour the contents into the payasam. Stir and cover with a lid. Let the payasam rest for 2 to 3 hours. Your delicious breadfruit payasam is now ready to serve. Serve warm or chilled. You will love it!


Tip:

If you cannot spare the time to make coconut milk or if fresh coconuts are not at hand, just use a litre of good quality canned coconut milk. You can also use the prescribed quantity of coconut milk powder in a litre of water. I make my own coconut milk because Kerala is a land of coconuts where fresh sweet nuts are available everywhere.

Note:

It is important that the bread fruit be fresh and fully mature to make this delicious payasam. Fresh fruits feel hard when squeezed. Tender fruits will be dark green and have rougher peel with the protrusions close together whereas mature fruit will be a lighter shade of green and have much smoother peel. So too, a greener stem indicates fresh fruit whereas a yellow stem may denote ripening fruit or a shop soiled one.

Sunday, 22 April 2012

266) ÉNNAKÀYI


ÉNNAKÀYI
HOT N’ SPICY OIL BATHED
EGG PLANT ROAST


Ingredients:

     1)    Small (egg sized) eggplants / aubergines / brinjals – 750 gm.
     2)    Hot red chili powder – 2½ teaspoons
     3)    Coconut oil or other cooking oil – 2 tablespoons
     4)    Garlic – 1 pod
     5)    Salt – 1¼ teaspoons


To Cook:

          Wash the eggplants. Without removing the stem, use a sharp knife to slit the eggplant lengthwise twice or thrice down to the stem so that it resembles a flower with 4 to 6 petals.


          Separate the garlic cloves and crush them lightly. Set a thick cast iron wok (for the best taste) or a non-stick wok on high heat. Pour in the oil and tip in the crushed garlic cloves. As soon as the oil is hot, lower the heat and stir till the garlic turns brown.

          Tip in the chili powder and stir once. Quickly chuck in the eggplants. Sprinkle the salt. Stir gently and cover with a lid. Roast patiently on low heat, occasionally giving a general stir. It may take 20 to 30 minutes (depending on the size and the maturity of the eggplants) for the eggplants to get roasted to perfection (see picture). Switch off the heat and serve either hot or cold with porridge, rice gruel, cherupayar kanji or as a side dish to rice. Énnakàyi is so tasty; you will want to keep on licking your fingers.

Enjoy!!!

Note:

Persons who are not allowed to take oily food for health reasons can bake the slit eggplants in the microwave oven and then roast them in a non-stick wok using just a little oil and chili powder. They can use a little less of salt and sprinkle a few drops of water in the wok while roasting the eggplants and the garlic slowly with the occasional stir; keeping the eggplants covered with a lid till they are done.

265) AMBYA AMBAT


AMBYA AMBAT
A DELICIOUS, RIPE, WILD MANGO
CURRY DESSERT


Ingredients:

     1)    Fully ripe wild mangoes – 1 kg. (10 to 11 Nos.)


     2)    Spilt chickpea lentils (chana dal) – 100 gm.
     3)    Cashew nuts – 25 gm.
     4)    Dry hot red chilies – 4 Nos.
     5)    Fresh coconut – 1 no.
     6)    Turmeric powder – ½ teaspoon
     7)    Coconut oil – 2 teaspoons
     8)    Mustard seeds – ½ teaspoon
     9)    Cumin seeds – ¾ teaspoon
     10)     Curry leaves – 3 sprigs
     11)     Jaggery (unrefined cane sugar) – 500 gm.
     12)     Salt – 1¼ teaspoons


To Cook:

          Wash and drain the chickpea lentils. Put the chickpea lentils together with the cashew nuts into a pressure cooker. Pour in 2 glasses of water, put on the lid and set on high heat.as soon as you hear the first whistle, turn down the heat to minimum. Cook for 5 minutes and switch off the heat.

          Meanwhile, wash and peel the mangoes. Do not discard the peel, but keep it in a bowl and pour in half a glass of water. Squeeze nicely with your fingers and collect the flavorsome peel juice.

          By now, the steam in the pressure cooker should have subsided enough to open the lid. Pour in the mango peel juice and tip in the peeled mangoes. Close the lid again and set on high heat. As soon as you hear the first whistle, switch off the heat and allow the cooker to cool naturally.

          In the meantime, put the jaggery in a pan together with half a glass of water. Set on low heat. Stir occasionally till the jaggery is fully melted. Sieve and set aside.

          Grate the coconut. Put the grated coconut and the red chilies into a food processor. Pour in a glass of water and grind to superfine paste. Remember, the smoother the paste, the tastier will be the curry. Pluck the curry leaves off their sprigs and set aside.

          Transfer the contents of the pressure cooker into a wide curry vessel. Pour in the melted jaggery and tip in the salt. Set on high heat. As it starts to boil nicely, put in the coconut paste and the turmeric powder. Stir well.
As it boils again, switch off the heat and cover with a lid. Set a small pan on low heat. Pour in the coconut oil and throw in the mustard seeds. As soon as they are about to finish spluttering, tip in the cumin seeds. Stir twice and throw in the curry leaves. Stir once and tip over the contents of the pan into the curry.

          Your super delicious ambya ambat is ready to serve. Serve either hot or cold as dessert.

Enjoy!!!

Notes:

     1)    The tanginess and the flavor of the wild mangoes may vary from tree to tree and from place to place. So it would be prudent to taste the curry and to add more salt or red chili powder or sugar if found necessary.

     2)    If wild mangoes are not available, you can use any other mangoes.

     3)    The Konkani people love to bite and suck the flesh off the delicious wild mangoes from the fibres surrounding the stones. The stone is then dipped into the thick curry and sucked again with relish. This is repeated several times till the last bit of flesh is off the stone. The combination of the flavors and taste of the curry with those of the wild mangoes is what makes it a gourmet’s delight. Try for sure!

Saturday, 21 April 2012

264) WILD MANGO JAM


WILD MANGO JAM  
Introduction:

          Wild mangoes grow almost all over the Indian countryside. Packed with tons of flavor, the smallest among these wild mangoes is called ‘Kadukachi’ in Malayalam and ‘Goyant’ in Konkani. Each large tree produces thousands of these mangoes which ripen during the summer vacation. These wild mangoes are full of fibre. They are excellent appetizers and aid in digestion.


          Till just a couple of decades ago, the children would run to the base of the mango trees to collect the fallen fruit and joyously bite into the luscious flesh, sucking in the juice while dribbling some over their chins and through their fingers. What a delight to lob a few stones at the mangoes swaying in the wind! What fun to compete to collect the strewn mangoes!
Old women could be seen scampering toward the laden mango trees to pick the ripe fallen fruits to make delicious curries like ambya umman, pikkile ambya gojju, pikkile ambya saasam, ambya ambat, pazhutta maambazha pulisseri, etc.

          However, nowadays, the older women would rather watch T.V. and the children find themselves glued to their computers.

          This year, a wild mango tree in our backyard provided us with hundreds of small delicious mangoes: which is why I am trying to give you as many mango recipes as possible before we move to Wayanad in a week’s time. The wild mango jam which I made today became an instant hit with the children. Do try this healthy recipe which contains no chemicals or preservatives.


Ingredients:

     1)    Freshly made wild mango pulp – 1 measure by volume (take the entire pulp at your disposal as one measure)
     2)    Sugar – ¾ measure by volume


To make the pulp:

          Wash and peel the ripe wild mangoes. Put the peeled mangoes into a pressure cooker. Pour in enough water to immerse just half the quantity of mangoes. Put on the lid (with the weight) and set on high heat. As soon as you hear the second whistle, switch off the heat and let cool naturally.
By the time the steam subsides fully, the cooking process is complete. Open the lid and drain off the stock. Let the mangoes cool down to room temperature.


          Squeeze the mangoes with your finger. As the mangoes are well cooked, the clear pulp will come off the stone, leaving only the fibres attached to the stone.


          Now pass the pulp through a coarse sieve by pressing and rubbing with your fingers. Measure the quantity of the pulp, transfer to a wide stainless steel vessel and set aside.


To cook the jam:

          Set the stainless steel vessel containing the pulp on high heat. Tip in the sugar and stir with a flat, lightweight stainless steel ladle. The sugar will dissolve fully, thickening the jam. Keep stirring. Soon the jam will turn translucent to an amber-like golden yellow colour. Switch off the heat and let cool naturally.

          Once cool, transfer to a clean, sun-dried glass jar and refrigerate. Enjoy as such or with bread or as a topping for vanilla ice-cream.

You will love it!!!


Notes:

     1)    If you do not have wild mangoes, use any ripe mango.

     2)    Some mangoes which are very sour may need more sugar, perhaps the same volume as the pulp or more. Your taste buds are the best judge in the matter.

     3)    If you love the tanginess and the full-bodied flavor of mangoes, do make green mango jam using fully mature unripe sour green mangoes. Kids love this jam and gain plenty of vitamins too. For making this jam, use big mangoes of any good cultivar.

263) NUCHI


NUCHI
KONKANI COCONUT RICE
A DELICIOUS, EASY-TO-COOK BREAKFAST DISH


Ingredients:

     1)    Fine scented raw rice (for best taste and flavor) or any other aged raw rice – 500 gm.
     2)    Fenugreek seeds – ¼ teaspoon
     3)    Mustard seeds – ½ teaspoon
     4)    Urad dal (split black gram lentils) – 1 teaspoon
     5)    Dry hot red chilies – 3 Nos.
     6)    Coconut oil – 1 tablespoon
     7)    Salt – 1¼ teaspoon
     8)    Water – 1 litre
     9)    Freshly grated coconut – 2 cups or more


To cook:

     Wash and drain the rice. Break each red chili into two or 3 pieces. Set a thick cast-iron wok (for the best taste) on high heat. Pour in the coconut oil and throw in the mustard seeds. As soon as the mustard seeds are about to finish crackling, tip in the urad dal.

     Stir till the dal turns a light brown. Now tip in the fenugreek seeds. Stir once and throw in the red chilies. Stir twice and pour in the water. Tip in the salt. As the water starts boiling, put in the rice. Once it starts to boil again, turn down the heat to minimum and cover with a lid. Stir once every minute (for cooking evenly and for keeping from sticking to the base and for uniform absorption of salt and flavors).

     Taste the liquid and add more salt if required. The rice will cook in 8 minutes and the water will be fully absorbed. Tip in the grated coconut. Stir well and switch off the heat. Your delicious nuchi is ready to eat. Serve hot with any pickle (the best accompaniment is mango pickle).

Bon appétit!!!

262) KONKANI CUT MANGO PICKLE


KONKANI
CUT MANGO PICKLE


Ingredients:

     1)    Young green sour mangoes – 1500 gm.
     2)    Dry hot red chilies – 100 gm.
     3)    Dry Kashmiri chilies – 100 gm.
     4)    Mustard seeds – 100 gm.
     5)    Asafoetida powder – ½ teaspoon
     6)    Powdered salt – 125 gm.

To Make:

     Dry a clean, airtight glass jar or a food grade plastic jar in the sun for an hour. So also set out the jar and the lid of your food processor to sun-dry.
Wash the mangoes thoroughly in a solution of 3 litres of water with 30 ml. of vinegar. Rinse well in tap water and use a clean cotton cloth to wipe the mangoes of all moisture. Use a clean, dry cutting board and a clean, sharp knife to cut the mangoes to pieces.

     The pieces can be small or big as you prefer but should be fairly uniform in size. The mango stones are bitter and have to be discarded. Put the mango pieces in the sun-dried jar.

     Pluck and discard the stems of the dry chilies. Put the chilies (both types), the mustard seeds, the asafoetida powder and the powdered salt into the sun-dried jar of the food processor. Grind for a minute. Now pour in enough purified water (for best keeping quality) or boiled and cooled water to grind the mixture to superfine paste.

     Use a clean, dry spoon to put the paste over the cut mango pieces. Pour a bit more purified water into the jar of the food processor. Beat once and pour the sauce over the pieces. Now pour in more purified water into the pickle jar to fully immerse the mango pieces. Use a clean, dry spoon with a long handle to mix in the paste. Put on the lid tightly and keep for at least 3 days for the mangoes to marinate.

     Start serving from the fourth day. Taste and add more powdered salt if required. Mix and serve with roasted idlis, undis, nuchi, pichpichi upma, machkats, thick dosas, cherupayar kanji or with any rice dish.

Enjoy!!!


Konkani cut mango pickle  with nuchi

Notes:

     1)    Konkani cut mango pickle, when prepared and stored hygienically lasts for up to a year without the aid of artificial preservatives. In this case, salt is the only preservative.

     2)    Wild, sour mangoes give the very best flavor and taste.

     3)    If the jar of your food processor is smaller, you can grind the paste in 2 or 3 batches.

Thursday, 19 April 2012

261) SAVORY BUBBOOS


SAVORY BUBBOOS
SOFT, SALTY, DEEP-FRIED
KONKANI BUNS

Ingredients:

     1)    Maida (refined white wheat flour) – 1 kg. for the batter plus 150 gm. for the dusting
     2)    Fresh thick curd – 500 ml.
     3)    Baking powder – 2 teaspoons
     4)    Powdered salt 1½ teaspoons
     5)    Any cooking oil – to deep-fry

To Make:

          Put all the ingredients except the dusting flour into a mixing bowl and knead well till the dough is nice and soft. Now scoop up some dough with your fingers and make lime sized balls. Dip the balls into the dusting flour and flatten to 5 mm. thick round puris (flatbread) with a rolling pin. Spread them out on sheets of paper so that they do not stick to one another.

          Set a wok of cooking oil on high heat. As soon as the oil is hot (before it smokes), gently slip in a puri (if the wok is big, you can fry 2 or 3 at a time). Turn over the puris carefully (since they are heavy) so as to fry both the sides. Take care to lower the heat to medium if the oil gets too hot.

          As light brown spots begin to appear, lift out your savory bubboos and drain off the excess oil. Continue till all the bubbooses are fried. Serve hot either by itself or with mooga daali usli or with dali toye. Try this recipe for sure. You will love it!

Savory bubboos with mooga daali usli

Enjoy!!!

260) MOOGA DAALI USLI


MOOGA DAALI USLI
A DELICIOUS, PROTEIN RICH,
KONKANI GREEN GRAM LENTIL DISH


Ingredients:

     1)    Moog dal (split green gram lentils, ‘cherupayar parippe’ in Malayalam) – 300 gm.
     2)    Tender ginger – 1 inch piece
     3)    Hot green chilies – 2 Nos.
     4)    Dry hot red chilies – 3 Nos.
     5)    Tender curry leaves – 2 sprigs
     6)    Asafoetida powder – ¼ teaspoon
     7)    Coconut oil or other cooking oil – 2 teaspoons
     8)    Mustard seeds – ½ teaspoons
     9)    Freshly grated coconut – 1 cup
     10)     Salt – 1¼ teaspoons
     11)     Water – 300 ml.


To Prepare:

          Wash the moog dal thoroughly in 2 or 3 changes of water. Soak in water for 30 minutes. Peel the ginger and chop to superfine pieces. Discard the stems of the green chilies and cut each one once lengthwise and once across to get 4 pieces. Break each red chili into 2 or 3 pieces. Pull the curry leaves off their sprigs and set aside.


To Cook:

          Set a thick cast iron wok (for the best taste) on high heat. Pour in the oil and throw in the mustard seeds. As soon as the mustard seeds are about to finish spluttering, tip in both types of chilies, the curry leaves and the asafoetida powder. Drain off the water from the soaked moog dal using a strainer and chuck in the dal. Tip in the chopped ginger. Pour in the water (300 ml.) and sprinkle in the salt.

          When it starts to boil, turn down the heat to minimum and cover with a lid. Let the moog dal cook slowly. Stir occasionally for cooking evenly. As all the water is absorbed by the dal, you will find that it is soft and well cooked. Now mix in the grated coconut and switch off the heat (alternatively, you can use the grated coconut for a dressing as well).

          Your delicious and easy-to-make mooga daali usli is ready to eat. Serve hot as such or with savory bubboos, black gram lentil vada (‘Ambado’ in Konkani, ‘Uzhunnu vada’ in Malayalam), chappatis, puris or with freshly baked bread.

Mooga daali usli with savory bubboos

Enjoy!!!

Wednesday, 18 April 2012

259) CHAKKA PUZHUKKE


CHAKKA PUZHUKKE
(VERSION ‘A’)
A SIMPLE, SUPREMELY DELICIOUS
KERALA JACKFRUIT DISH OF
MOUTHWATERING AROMA


Introduction:

          For generations, Malayalis have used jackfruit to make their favorite ‘chakka puzhukke which is enjoyed either by itself as the main dish or with ‘kanji’ which is rice gruel. The seeds and the fleshy pulp jacket of fully mature, unripe jackfruit are used to make this wonderful dish. Though there are many slightly different versions prevalent all over Kerala, I wish to give you two of my very best recipes.

          For both recipes, I use only ‘varikka chakka’, the best among the two broad categories of jackfruit in existence. The other category, ‘koozha chakka’ or ‘pazham chakka’ is avoided because it is full of fibrous strings in slushy flesh when cooked and gets stuck to one’s throat.

          However, the second category is good for making crispy jackfruit chips, ‘chakka varattiyathe’ (a sort of jackfruit jam which can be enjoyed as such or used as a chief ingredient to make other jackfruit dishes), jackfruit wine, salted jackfruit, etc. So if you can manage to get your hands on the right jackfruit, be sure to prepare and to enjoy this recipe.


Ingredients (for 6 to 8 persons):

     1)    Clean pulp jacket extracted from a fully mature unripe ‘varikka’ jackfruit – 1350 gm.


     2)    Cleaned jackfruit seeds with the thin red inner skin intact – 350 gm.


     3)    Medium sized fresh coconut – 1 no.
     4)    Hot green chilies – 3 Nos.
     5)    Cumin seeds – 1 teaspoon
     6)    Garlic – a small pod
     7)    Tender curry leaves – 3 sprigs
     8)    Turmeric powder – 1 teaspoon
     9)    Coconut oil – 1 tablespoon
     10)     Powdered salt – 2½ teaspoons


To Cook:

          Peel and separate the garlic cloves. Cut the jackfruit pulp jackets roughly to square pieces of around an inch in size (see note no. 1).


          Chop the seeds to half inch bits (for tips on cutting up the jackfruit, see my crispy jackfruit chips recipe).


          Put the chopped bits and pieces into a 5 litre pressure cooker and set aside. Break the coconut taking care to collect the coconut water. Sieve and set aside. Grate the coconut. Put the grated coconut, the green chilies, the cumin seeds and the garlic cloves into a food processor and grind to rough paste without adding any water.

          Sprinkle the turmeric powder and the powdered salt over the bits in the pressure cooker. Put in the coconut paste. Mix well with a ladle. Pour in the coconut water. Now pour in plain water to immerse just more than half the ingredients. Pluck the curry leaves off their sprigs and tip them in. Mix nicely again.

          Close the lid and set on high heat. As soon as you hear the first whistle, turn down the heat to minimum. Continue to cook for 2 more minutes and then switch off the heat. Let the cooker cool naturally. Do not let out the steam. This will give it enough time to cook the jackfruit to perfection. Once all the steam has subsided, open the cooker. Dribble the coconut oil over the chakka puzhukke.

          Serve fresh and hot. The aroma of the chakka puzhukke is so inviting and appetizing that you will find yourself hungry and salivating. So set out your plates and tuck in.
Enjoy!!!

Notes:

     1)    The fruit pulp and the seeds need to be scrupulously clean. No other parts such as the nylon-like strands or the plastic-like whitish seed coat should find their way into the puzhukke. It is worse than finding bones in fish fillets since these things stick to one’s palate and throat

     2)    This is the mild version which is much loved. If you need more heat, you can add more green chilies.

     3)    Chakka puzhukke helps greatly to relieve constipation since the fibre in the jackfruit aids in cleaning out the intestines.

     4)    Chakka puzhukke needs to be eaten fresh and hot since it loses taste when chilled or reheated. So if you are cooking for just 2 or 3 persons, take care to reduce the ingredients proportionately.

Follow us by Email and never miss a new recipe!