Saturday 10 August 2013

278) PURE BANANA HALWA

   PURE BANANA HALWA
A HEAVENLY DESSERT

Introduction:

Malayalis as a whole are mad about Nendran banana halwa. Keralites visiting relatives abroad almost invariably carry Nendran banana chips and Nendran banana halwa as prized gifts for loved ones. For preparing this superb banana halwa, no other variety of banana can be used simply because Nendran banana is equal to Nendran banana alone. You will realize this fact when you eat it.

That is why the farmers in Kerala simply ignore even the Robusta varieties which yield 50 to 60 kilo bunches in preference to cultivating Nendran banana plants which yield just 12 to 15 kilo bunches. If you wish to eat pure banana halwa, you have to make it at home.

Commercially available banana halwa, sold in many bakeries all over Kerala generally contains a whole lot of Maida (refined white wheat flour), cheap hydrogenated vegetable oil and artificial food colour with a little banana added for the necessary flavor and taste.

For making banana halwa, you need Nendran bananas that are so ripe that the naturally golden yellow skin is about to turn black. The bananas have to be peeled and ground to superfine paste (there should be no lumps) in your food processor. Do not add any water at any time. You may need around 1.2 kilos of ripe unpeeled bananas to extract a kilo of paste.

Ingredients:

     1)    Fully ripe Nendran banana paste – 1 kilo
     2)    Sugar -1 kilo
     3)    Fresh unsalted butter – 170 gm.
     4)    Cardamom pods – 3 Nos.

To cook:

          Shell the cardamom seeds, crush and set aside. Grease a shallow (¾ inch/ 2 cm. deep), wide stainless steel plate (around 12½ inches/ 32 cm. diameter is just right) with ghee (clarified/melted butter) or simply line it with butter paper. Keep a small plate with a little water (½ inch/ 1.5 cm deep) nearby.

Set a fairly big non-stick wok on high heat. Pour in the thick banana paste and the butter. Stir continuously. Let the banana paste fry in the butter for around 15 minutes. Now pour in the sugar bit by bit, gently stirring it in. go on stirring gently, never letting the syrupy paste either stick to the bottom or to brown. The sugar will liquefy at first and all the melted butter will be absorbed. Go on stirring till much of the moisture evaporates.

Now the melted butter will start to ooze out of the halwa. Tip in the crushed cardamom seeds and stir. Now drop half a teaspoon full of halwa into the plate of water. Wait for 5 to 10 seconds for the halwa to cool. And then take it out, squeeze it between your thumb and forefinger to check the consistency. If it is soft and jelly-like, you need to stir the halwa for some more minutes.

Test again. Once it is semi-hard (not too hard), you will succeed in rolling it easily into a small ball. Taste it. Your teeth should sink in easily while the halwa feels somewhat chewy. Now is the time to switch off the heat.

Pour the sizzling halwa into the greased or lined plate or tray and let cool for 2 to 3 hours.
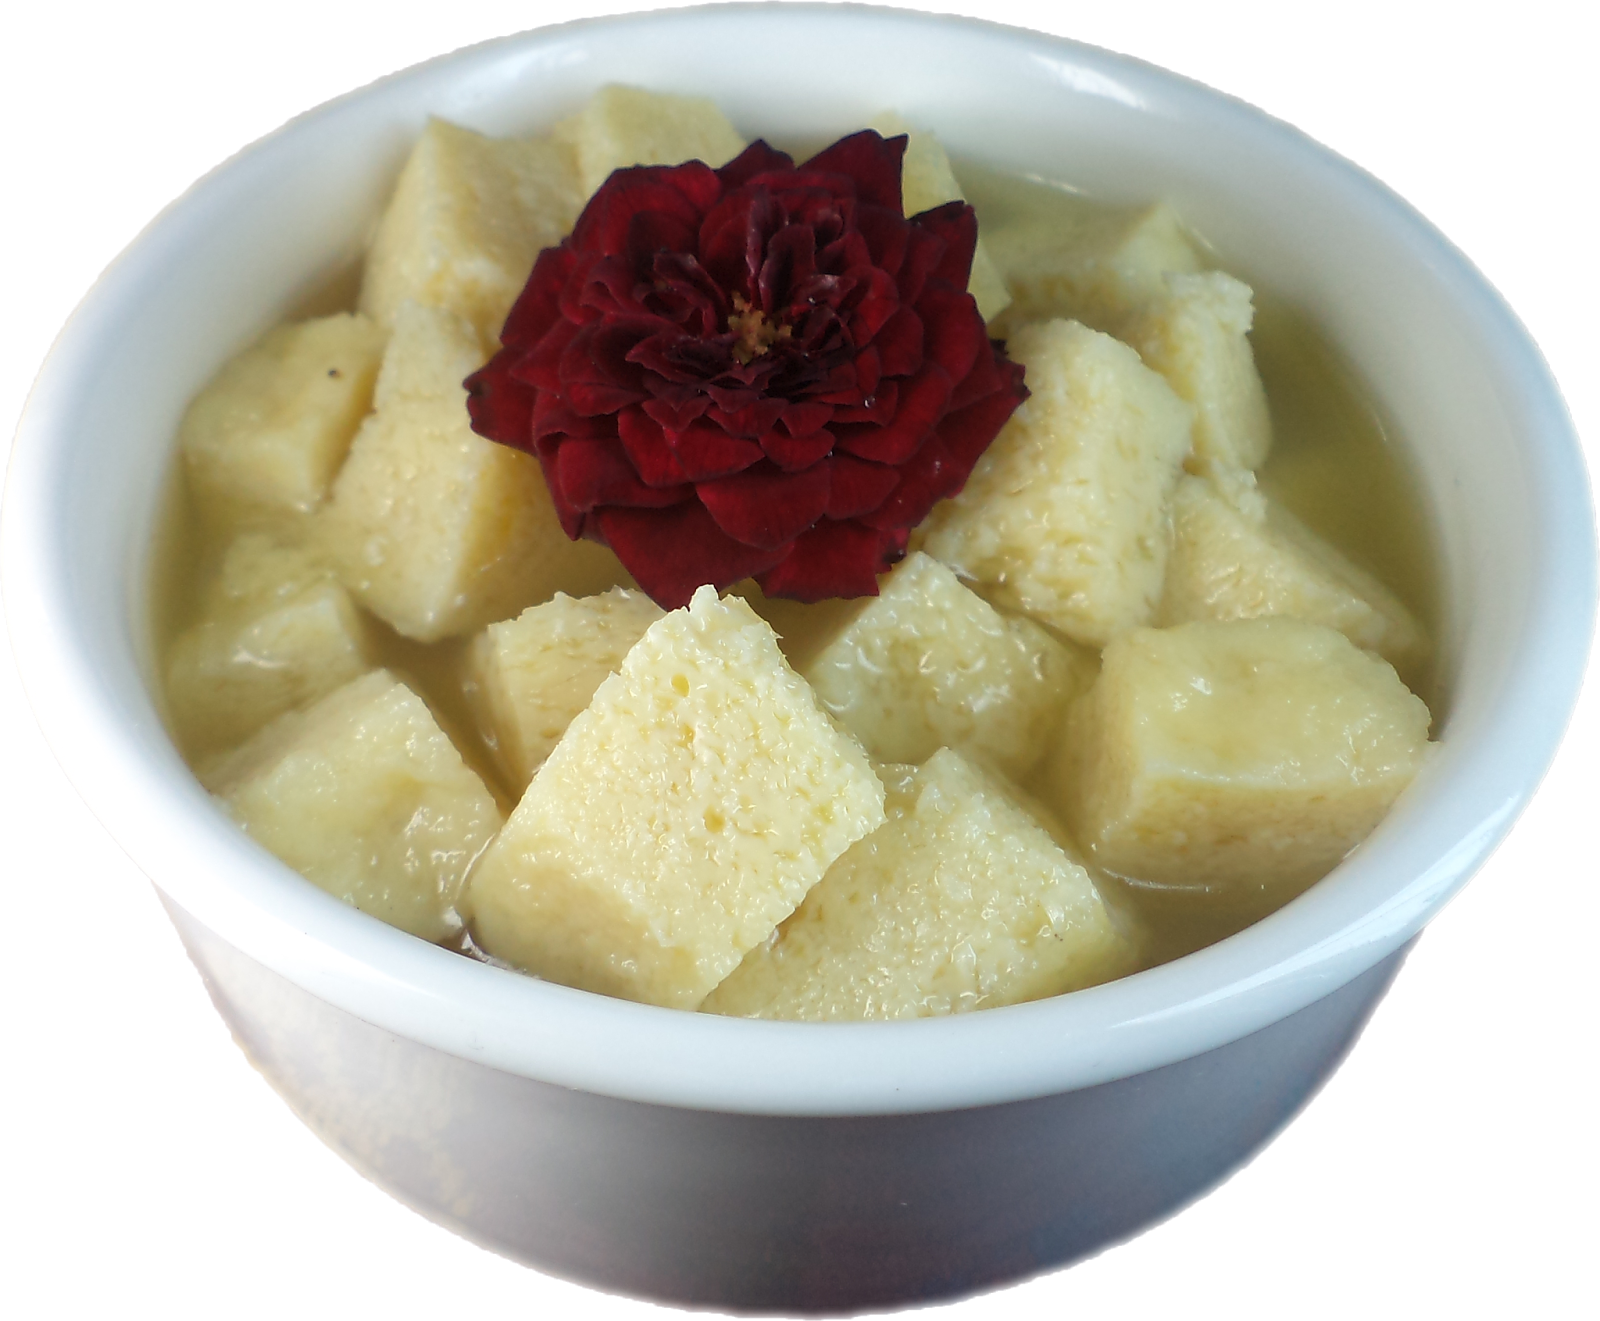
Cut into bite sized chunks and serve. Wrap the rest of the chunks in butter paper and store for later use. This is the dessert I love most.

Enjoy!!!

Notes:

     1)    Hygienically prepared pure banana halwa will keep for months at room temperature in an airtight vessel.

     2)    If you keep stirring the halwa for some more minutes till the test sample is quite hard, you will get excellent banana halwa candy which will keep for years. This candy is very difficult to cut. However, if you can cut it into sweet sized pieces, it will last a long time in your mouth and is a real delight to suck on.

     3)    If the halwa sticks to the bottom of the plate and does not come out, heat the plate a little bit by holding it over the gas flame and then turn it over onto the cutting board.

     4)    On pouring the halwa onto the tray, if it does not spread uniformly, you can use the greased bottom of a spoon to smoothen it.

277) PULIKOJAL

PULIKOJAL
A SOUR AND SWEET, HOT AND SALTY
LIP-SMACKING CURRY

Introduction:

Pulikojal is a traditional Konkani curry. It is so tasty that all the senior members of my family insist on having it for every feast, no matter how many other curries are to be served. I would like to present you my own version of pulikojal which my husband and children love so much.

Ingredients:

     1)    Fresh grated coconut or chopped dry coconut – 1 cup
     2)    Coriander seeds – 1 tablespoon
     3)    Black gram lentils (urud dal) – 2 teaspoons
     4)    Cumin seeds – 1 teaspoon
     5)    Fenugreek seeds – ½ teaspoon
     6)    Dry hot red chilies – 10 Nos.
     7)    Tamarind – a gooseberry sized bit
     8)    Jaggery (unrefined cane sugar) – 75 gm.
     9)    Rice powder – 1 tablespoon
     10)     Bottle gourd or ash gourd – 900 gm.
Home grown bottle gourd

     11)     Coconut oil – 2 teaspoons
     12)     Mustard seeds – ½ teaspoon
     13)     Curry leaves – 1 sprig
     14)     Salt – 1 teaspoon

To cook:

          Peel the bottle gourd or ash gourd. Discard the peel and the central seed core. Cut into big chunks and transfer to a pressure cooker. Pour in a glass of water, close the lid and set on high heat. As soon as you hear the first whistle, switch off the heat and let the cooker cool naturally.

          Meanwhile, set a wok or frying pan on high heat. Tip in the grated coconut, the dry chilies, the lentils, the coriander seeds, the cumin seeds, the fenugreek seeds and the tamarind. Stir nicely. As the mixture heats up, turn down to medium heat and keep stirring till the mixture starts to turn golden brown.

          Now tip in the rice powder and continue to stir till it turns fully brown. Take care that the mixture does not burn or turn black. Switch off the heat. Transfer to your food processor. Pour in 150 ml. of water and grind to superfine paste.

          The cooker should have cooled down by now. Open the lid and transfer the cooked bottle gourd/ash gourd to a suitable curry vessel. Pour in the ground paste. Tip in the salt and the jaggery. Stir gently and add enough water to suit your serving needs (If you wish to use it as a pouring curry over rice, use enough water to get it to a pourable consistency. If however, you intent to serve it as a side dish, use just enough water to make a thick curry).

Set on high heat and bring it to a boil. Take care to stir frequently to prevent the curry from burning at the base. Check to see if the jaggery has dissolved fully. Taste and add more salt if required (If you have a sweet tooth, you can add some sugar as well). Now switch off the heat and cover with a lid.

Set a small pan on low heat. Pour in the coconut oil and throw in the mustard seeds. Pull the curry leaves off the sprig.  As soon as the mustard seeds are about to finish popping, throw in the curry leaves. Stir once and transfer the contents of the pan into the curry. Your ultra-delicious pulikojal is now ready to eat.


Enjoy!!! Cook for sure!

276) GÛL GÛL GAALS

GÛL GÛL GAALS
FIRST MILK RASGULLAS
A SYRUPY DESSERT


Introduction:

Do you want to know why I call this dish gûl gûl gaals? It is all because of my dear elder brother who was a bully (and still is) during our childhood days. As soon as he saw me or one of our several cousin sisters who all had chubby cheeks, his hands would quickly rise up to grasp them on either side and strive to pull them apart, while he laughed and shouted “Gûl gûl gaal! Gûl gûl gaal!” amidst our screams.

Whenever we spotted him, our palms would instinctively rise to protect our cheeks. Later, after his marriage and ours, we all escaped from his cheek squeezing fingers while his dear plump wife gets their wholehearted attention. This dish reminds me so much of chubby cheeks and of my dear brother that I have had to name it gûl gûl gaals. I am sure you will love this chubby, delicious, nutritious dessert.

Ingredients:


     a)   For the gaals

     1)    First milk (thick buttery cow’s milk obtained the first time after calving – for details, go to my first milk pickle recipe) – 500 ml.
     2)    Sugar – 125 gm.
     3)    Baking powder – 1 teaspoon
     4)    Rose essence – 5 drops

     b)   For the syrup

     1)    Sugar – 400 gm.
     2)    Water – 500 ml.
     3)    Cardamom pods – 2 Nos.
     4)    Rose essence or vanilla essence – ¼ teaspoon OR saffron – 1 pinch (best choice)

To Cook:

Mix the sugar, baking powder and the rose essence with the first milk thoroughly and pour it into a non-stick mold or an ordinary mold lined with non-stick cooking paper or butter paper. Put the mold in your steamer and steam for 15 to 20 minutes. Dip in a knife to see if the milk is fully cooked. The knife should come out clean. The cooked first milk will have the consistency of cottage cheese (Paneer). Set aside to cool.

When cool, take out of the mold and cut into cubes or into pieces of any size or shape of your choice. You can even use small shapely cutting molds to suit the occasion. Set aside.

Now select a medium sized vessel or wok to prepare the syrup. Pour in the water and tip in the sugar. Set the vessel on high heat. Stir occasionally till the sugar melts. As soon as the syrup comes to a boil, tip in the first milk cubes. Meanwhile, shell and crush the cardamom seeds and tip them in. Finally, tip in either the rose essence or the vanilla essence or the saffron.

Boil for 3 minutes more and switch off the heat. Let cool naturally. Serve gûl gûl gaals cold or chilled.

Enjoy!!!

275) FIRST MILK PICKLE

FIRST MILK PICKLE
THE HEALTHIEST EVER PICKLE


Introduction:

          Most farmers in Wayanad supplement their income through a little dairy farming. Besides keeping indigenous cows, these farmers also possess high milk yielding breeds like Jersey and Holstein-Friesian. Each of these cows give 10 to 25 litres of milk a day. The milk which is produced on the day of calving is often quite thick, buttery yellow in colour and smells of eggs. This first milk is so rich that the calf is not allowed to drink more than a couple of litres as overfeeding may lead to indigestion, diarrhea and death. Hence the farmers simply throw the excess first milk down the drain. Some farmers even discard the milk for the first and second week as well.


We were shocked to hear about such wastage which would add up to tens of thousands of litres of fine milk every day. This milk is so rich in fat, proteins, antibodies, calcium, vitamins and other minerals. Have you noticed with what love the mother cow looks at her newborn calf? Naturally, the milk would contain a good portion of this overflowing, unconditional love. How can it be wasted? We hear of so many little children dying of malnutrition and so many people going hungry around the world. Isn’t it right to wonder if it is not the callous wastage of food and the selfishness of humans which leads to such misery?

One of the reasons I freely share my recipes and thoughts with you is due to our earnest hope that the consciousness of many a human being may lose its hardness of heart and warm up with sentiments of love, of the joy of giving, of sharing, of caring for and of comforting all in need. Perhaps we could begin by avoiding wastage of food at home. Maybe we could share excess food, if any, with some neighbours who are old or infirm or poor or with hungry neighbourhood children. I hope we always remember that everybody is a child of Mother Earth and that everyone has a right to enjoy the magnanimous bounty of nature.

We asked our milkman to bring us this freshest first milk whenever one of his cows would give birth. I experimented with this milk and was able to create several wonderful recipes, one of which is the first milk pickle. My family just loves it. I am sure so will you.

To cook the first milk:

Collect as much excess first milk as may be available. Add salt to taste and stir well. Choose a non-stick bowl or vessel which will fit into a steamer. If the bowl is not a non-stick one, line it with butter paper or a non-stick cooking paper or a banana leaf and pour in the milk. Put it in the steamer and steam for 15 to 20 minutes. Open the lid and stick in the tip of a knife to check if cooked. When fully cooked, the first milk will become hard as cheese. Lift out the cooked milk and set aside to cool naturally.


When cool, overturn it on a cutting board, remove the butter paper and cut it into small cubes of around 1 centimeter. If there are too many, you can preserve the excess cubes in brine for later use. To make the brine, boil 500 gm. of salt per litre of water and then tip in the cubes. Boil again for 5 minutes and switch off the heat. When cool, transfer to a dry airtight container. Top it up with 100 ml. of vinegar, close the lid tight and store in a cool dark place. These cubes can be retrieved any time you wish to make more pickle or can be used in place of Paneer (Indian cottage cheese) or can simply be desalted (by soaking in water) and eaten like cheese.

Ingredients:

     1)    Fresh or salted first milk cubes (see note) – 800 gm.
     2)    Gingelly oil (sesame oil) – 100 ml.
     3)    Mustard seeds – ½ teaspoon
     4)    Fenugreek seeds – ½ teaspoon
     5)    Peeled garlic cloves – 150 gm.
     6)    Pigeon eye chilies – 15 Nos.
     7)    Peeled ginger – 1 inch piece
     8)    Curry leaves – 1 sprig
     9)    Cinnamon stick – 2 inch piece
     10)     Cloves – 5 Nos.
     11)     Turmeric powder – ¼ teaspoon
     12)     Hot red chili powder – 1½ teaspoons
     13)     Pickle powder – 5 teaspoons
     14)     Garam masala powder – ½ teaspoon
     15)     Mustard powder – 2 tablespoons
     16)     Sugar – 2 teaspoons
     17)     Salt – 1 teaspoon (for salted cubes) OR 1½ teaspoons (for unsalted cubes)
     18)     Water – 600 ml.
     19)     Vinegar – 100 ml.
     20)     Coconut oil or any other cooking oil to deep-fry the cubes – 500 ml.

To cook:

Set a wok or deep pan on high heat. Pour in the coconut oil. As soon as the oil is hot (it should not smoke), tip in the first milk cubes. Stir occasionally till the cubes are golden brown. As the cubes tend to do a little muttering and murmuring as they fry, please do not stand too close to the wok to avoid the chance spitting of hot oil. Once the cubes are golden brown, turn off the heat, lift up the cubes, drain off the excess oil and set aside.

Slit the pigeon eye chilies lengthwise on one side. Chop the peeled ginger to fine bits. Set a wok or a deep frying pan on high heat. Pour in the gingelly oil and throw in the mustard seeds.as soon as the mustard seeds are about to finish spluttering, lower the heat and throw in the fenugreek seeds. Stir for a minute. Pull the curry leaves off their sprig and throw them in. Tip in the chopped ginger, the garlic and the pigeon eye chilies and stir for 4 minutes on low heat.

Now put in the turmeric powder, the chili powder, the pickle powder, the mustard powder, the garam masala powder, the cinnamon stick, the salt and the sugar and stir for a minute. Chuck in the fried first milk cubes and stir well for 2 minutes. Now pour in the water and turn up the heat. Once it comes to a boil, stir nicely for 2 more minutes and switch off the heat. Once cool, pour in the vinegar and mix well.

Transfer to a sun-dried, airtight container and close the lid tight. Keep undisturbed for at least three days at room temperature. Your mouthwatering first milk pickle is now ready to serve. Open the container and mix the pickle up nicely with a dry spoon. Enjoy with rice or with any other meal.

Bon appétit!!!
Notes:

     1)    The first milk pickle tastes best when made using fresh first milk cubes. This time, I made the pickle using salted first milk cubes as fresh first milk was not readily available. While using fresh first milk cubes, take care to taste the pickle and add more salt if required.

     2)    First milk pickle, when prepared using salted cubes, can be stored at room temperature for a few weeks (if you can resist the temptation). However, pickle prepared using fresh first milk cubes has to be stored in the refrigerator.

     3)    If first milk is not available, do not fret but simply substitute the first milk cubes with Paneer (Indian cottage cheese) cubes. Happy? You have excellent Paneer pickle to enjoy!

Friday 9 August 2013

274) WILD MUSHROOM SAMOSAS

WILD MUSHROOM SAMOSAS
A TREAT FOR EVERYONE

Introduction:

         This year’s monsoon is the strongest ever we have known. Victims of global climate change, we have received more than 3 meters of rainfall in just 2 months with not a single wink of sunlight. Most of our vegetables perished in the rain. Kerala is plagued with floods and landslides. The dams are overflowing and there is mud everywhere. As you walk in the hill country with a heavy heart and with downcast eyes, what should surprise you but the thrilling sight of large wild mushrooms peeping out from beneath the mud! Though battered and splotched with mud, these welcome gifts from the boundless mercy of Mother Nature quicken your heart and instill hope and joy.

         Yesterday being a holiday, bitterly cold and raining as usual, we finished our breakfast and went to sleep for want of anything else to do. Hardly had we closed our eyes, than the doorbell rang. There was our neighbour, smiling, with a cover full of wild mushrooms in his hands. Lo! This recipe is born. Aren’t you lucky? Of course, we are luckier as we got to eat them first as did some of our neighbours to their sheer delight.

          Though edible wild mushrooms are exceptionally tasty, you can use any type of cultivated mushrooms such as oyster, milky or button mushrooms available in the supermarkets. While collecting wild mushrooms, one should be cautious since a good number of poisonous mushrooms grow alongside the edible ones. The traditional knowledge of the native population is invaluable in this regard. Turmeric is invariably added with every mushroom preparation as turmeric is believed to have the power of neutralizing toxins and poisons if at all present therein.

Ingredients (for around 50 to 70 samosas):

     a)   For the filling

     1)    Wild mushrooms (or grown ones) 350 gm.

     2)    Soy chunks – 200 gm.
     3)    Onion – 250 gm.
     4)    Hot green chilies – 4 Nos.
     5)    Powdered salt – 1¼ teaspoons
     6)    Turmeric powder – ½ teaspoon
     7)    Hot red chili powder – 1½ teaspoons
     8)    Garam masala powder – 1 teaspoon
     9)    Tomato – 100 gm.
     10)     Curry leaves – 1 sprig
     11)     Eggs – 4 Nos.
     12)     Black pepper powder – ½ teaspoon

     b)   For the jacket

     1)    Maida (refined white wheat flour) – 750 gm.
     2)    Gingelly (sesame) seeds – 2 teaspoons
     3)    Powdered salt – 1 teaspoon
     4)    Coconut oil or any other cooking oil – 2 tablespoons
     5)    Water – 360 ml.

     c)    To deep-fry

     1)    Coconut oil or any other cooking oil – enough to cover the samosas as they deep-fry

To prepare the filling:

Soak the mushrooms in a basin containing around 2 litres of water and 15 ml. of vinegar for 20 minutes. This will help dislodge all the mud. Rinse well in tap water, drain and chop to fine pieces. Soak the soy chunks in water for 30 minutes. Drain, chop finely and set aside. Peel the onion. Chop the onion, the green chilies and the curry leaves finely and set aside. Chop the tomatoes finely and set apart.

Put the chopped mushrooms and the chopped soy chunks in a basin. Tip in the salt, the chili powder, the turmeric powder and the garam masala powder. Mix in as thoroughly as possible with your fingers and set aside.

Set a non-stick wok or deep pan on high heat. Pour in the coconut oil. Tip in the chopped onions, the chilies and the curry leaves. Stir continuously. As the onion starts to brown, turn down the heat and continue to stir till it turns golden brown. Now tip in the chopped tomatoes and stir for a minute on medium heat.

Chuck in the mushroom soy mix and stir well. Cover with a lid and cook for 12 to 13 minutes. Now break in the eggs and stir well. Turn up the heat and keep stirring for around 8 minutes or until all the excess water at the bottom has evaporated. Now sprinkle the pepper powder, mix well and switch off the heat.

To prepare the jacket:

Put the maida (flour) in a mixing basin. Tip in the coconut oil, the salt, the gingelly seeds and the water. Knead nicely. Roll the dough into lime sized balls with your palms. Use a rolling board and pin to flatten each ball into small round chappatis (flatbread) of around 2 mm. thickness. If you like a thicker jacket, you have to roll the flatbread thicker.


          Cut each chappati into two halves and set aside on a wide platter or on paper (if you pile up too many, they may stick together). If you have one or two friends to help you, you can finish making all the jackets. If you are alone, it is better to make the samosas in batches of 15 to 20 per batch to keep the dough from sticking.

To fill:

Take up one of the halves and folding it slightly in the center, put one side of the cut end over the other, overlapping the edges slightly, press them lightly with your forefinger inside and the thumb outside to form a cone. Take care to see that the edges have stuck together perfectly as you do not want the filling to fall into the oil or for the oil to soak into the filling.

Now use a spoon to fill the cone loosely with the filling. Press the open edges of the jacket to close it firmly. Fill up the rest of the samosas likewise.

To deep-fry:

         Set a wok or deep pan on high heat. Pour in the coconut oil or any other cooking oil you prefer. As soon as the oil is hot (it should never be overheated to the point of smoking), gently slip in the samosas one by one so as to fill the pan comfortably leaving a little space to turn them over. Turn them gently every now and then till the jacket feels crisp when you turn it. Lower the heat and lift out before it browns. Drain off the excess oil and do the next batch. 

         Serve hot or warm. These samosas are quite easy to make and highly nutritious. Even though they take up some time, people of all age groups will love them. Do try!

Tip:

         You can make different types of samosas; savory, hot or sweet, veg or non-veg, by preparing creatively various fillings of your choice. The only thing is a filling needs to be fairly dry.

Thursday 8 August 2013

273) UPMA AND SONGE

UPMA AND SONGE
A TRADITIONAL KONKANI COMPLETE BREAKFAST

Introduction:

          Upma (often pronounced ûkmáve) and Songe (the ‘ge’ is pronounced as ‘gi’ in girl) is a scrumptious traditional Konkani breakfast combination which will give you an inkling of how Konkani people became such gourmets.

          Try eating Upma and Songe with boiled / steamed / roasted Nendran bananas, with deep-fried papads, with sweet jaggery coffee and you will know what we are talking about.

          The Upma has to be prepared using Upma Rava or Khandwa Rava or Benzi Rava which is coarse grained wheat semolina. Bombay Rava or fine wheat semolina will not do. For best taste, Upma and Songe should be prepared in cast-iron woks.

Ingredients for the Upma:

     1)    Upma Rava / Khandwa Rava / Benzi Rava (or coarse grained wheat semolina) – 250 gm.
     2)    Ginger – 1 inch piece
     3)    Water – 700 ml.
     4)    Mustard seeds – ½ teaspoon
     5)    Hot green chilies – 3 Nos.
     6)    Dry hot red chilies – 2 Nos.
     7)    Curry leaves – 1 sprig
     8)    Coconut oil – 1 tablespoon
     9)    Powdered salt – 1 teaspoon

Ingredients for the Songe:

     1)    Potatoes – 500 gm.
     2)    Onion – 100 gm.
     3)    Ginger – 1 inch piece
     4)    Water – 500 ml.
     5)    Hot green chilies – 6 Nos.
     6)    Curry leaves – 1 sprig
     7)    Hot red chili powder – 1 teaspoon
     8)    Coriander powder – 2 teaspoons
     9)    Turmeric powder – ¼ teaspoon
     10)     Coconut oil – 1 tablespoon
     11)     Coriander leaves – of 1 plant
     12)     Salt – 1½ teaspoons

To Cook the Songe:

          Wash and put the potatoes in a pressure cooker. Pour in enough water to immerse them, close the lid and set on high heat. As soon as you hear the first whistle, turn down the heat and continue to cook for 5 minutes. Now switch off the heat and let the cooker cool naturally.

          Peel the onion and the ginger and chop them to fine bits. Pull the curry leaves off their sprig and set aside. Chop the coriander leaves finely and set aside. Slit the green chilies lengthwise on one side or just chop them to big pieces.

          As soon as the steam pressure has abated by itself, open the cooker, drain off the water and peel the potatoes (in order to peel the potatoes, you can cool them by immersing them in cool water for a few minutes). Crush the boiled potatoes with your fingers, leaving no big lumps. The smaller lumps are needed to give texture to the Songe.

Pour in the water and set aside. Set a large cast-iron wok or deep pan on high heat. Pour in the oil and throw in the mustard seeds. As soon as the mustard seeds are about to finish crackling, tip in the curry leaves. Stir once and put in the onion, the ginger and the green chilies. Stir for 3 minutes on medium heat. Now pour in the potatoes and tip in the chili powder, the turmeric powder, the coriander powder and the salt.

Turn up the heat and stir nicely. As soon as it comes to a boil, taste and add more salt or chili powder if you so desire. Tip in the chopped coriander leaves (I have not used coriander leaves in the Songe in the picture as it was not readily available) to make it all the more fragrant and tasty. Stir and switch off the heat. Cover with a lid.

To make the Upma:

          Peel and chop the ginger to fine bits. Break the dry red chilies each into 2 or 3 pieces. Slit the green chilies lengthwise on one side. Pull the curry leaves off their sprig and set aside.

          Set a pan of water (700 ml.) on one stove and a cast-iron wok (to make the upma rich in iron and tastier) on the other, both on high heat. In the wok, pour in the oil and tip in the mustard seeds. As soon as the mustard seeds are about to finish popping, throw in the curry leaves and stir once. Now tip in the green chilies, the red chilies and the ginger. Stir twice or thrice and pour in the hot water from the pan. Add the salt.

As soon as it comes to a boil, pour in the rava gently with one hand while stirring it in with the other. Now lower the heat and cover with a lid. 2 minutes later, stir the Upma and cover again. Check after 5 more minutes. The rava should have absorbed all the water by now and thickened into fine, fragrant Upma. Stir and switch off the heat.


Do I need to tell you what else to do? Go ahead and enjoy!!!

Follow us by Email and never miss a new recipe!